In the previous post, we saw how to download and upload WordPress to our lodging. Now let’s see how to install it.
1. Creating the database
For this, in Cpanel, select MySQL Databases. Here, we indicate the name of the database; in this case I will use smoke and press the Create button. See how it displays a message that it has created a database called geo_fuma; this is because it adds to my Cpanel’s user the name the new database created.
 2. Create a user
Now, select the created base, and indicate that I would like to create a new user. I will call it blog and a password; when it’s pressed the create option, note how it indicates me that it has been created a user called geo_blog with the given password; we’ll assume it is called tinmarin. I suggest that you take notes while we make this process, because later you can forget it.
3. Assign rights to the user
Now, he indicated that I’m going to assign rights to this user. I select the geo_fuma database, geo_blog user and assign him all rights to install and access from WordPress.
4. Rename the configuration file.
With the data we have uploaded in the public_html directory it is a file named wp-config-sample.php, we edit its name, calling it wp-config.php
4. Edit the configuration.
Now we edit this file in the following area:
// ** MySQL settings – You can get this info from your web host ** //
/** The name of the database for WordPress */
define(’DB_NAME’, ‘putyourdbnamehere‘);
/** MySQL database username */
define(’DB_USER’, ‘usernamehere‘);
/** MySQL database password */
define(’DB_PASSWORD’, ‘yourpasswordhere‘);
See, it’s not much, but here a few times I’ve confused myself. The texts in bold are those that must change:
The database is called geo_Fuma
The user is called geo_blog
The password, in this case tinmarin (of course these data are imaginary)
Then you need to save the file. If you edit it locally, you have to upload to the remote server.
5. Install
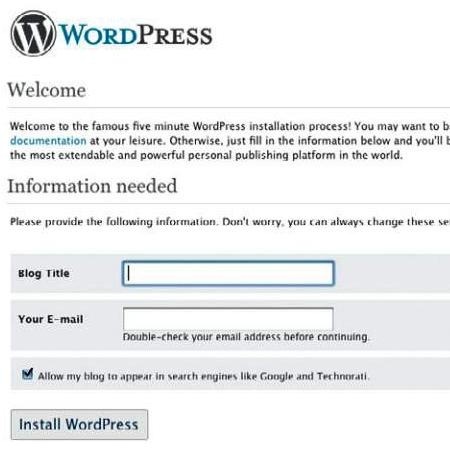
Just run the Geofumadas.com domain, it should appear the pane that says that everything is ready; asking me for input the name of the blog and email to install.

Subsequently, we receive the user and the provisional password with which you can access.
If you get a message that you can not access the database, it is likely that there are bad data in step 4.

Once inside you must change the auto generated password by one of our choice. We must not forget that from the wp-admin folder it should be deleted the folders install.php, upgrade.php, and install-helper.php.
 Autocad Software, Bentley Microstation, Gis Google Earth, Gis System Geomate Provides Services For Complete Gis Software And Solutions, Autocad Software, Autocad Courses, Bentley Microstation, Microstation Software, Gis Google Earth, Open Source Gis And More.