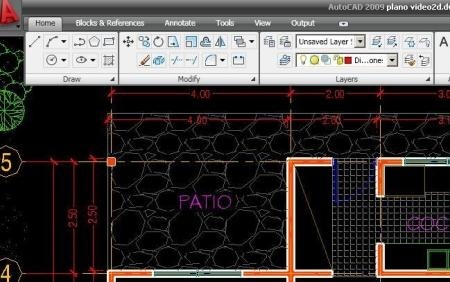
Many users of the old guard did not like much the Ribbon style design of AutoCAD 2009 menus, but not worth much kicking. It’s only a problem of neuronal disorientation, just as when we were working on a different drawing board, where the basic tools were not in the same disorder as ours. It happened with Office 2007 and now with AutoCAD, we feel uncomfortable because the menus location takes time for using frequently commands and because AutoDesk won’t return back to this form, you will need to get used to it.
Surely that from this topic English blogs have written extensively, and AutoCAD 2009 manual should tell a thousand tips to take advantage of the new design, in this case I will leave some tips for surviving with the Ribbon, as I have done…

 0. Get used to the Ribbon
This is the first; it has been forced to change because future generations will see it as well. Manuals will come this way and in the same way it cost us to pass from text commands in the side menu of AutoCAD R12, this drink must be taken sooner or later.
The most that can be got is that AutoCAD 2011 will bring an option to make the interface as 2008. But we must not have much hope.
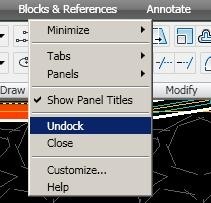
It is not bad if you place it to the side, quite similar to the task navigation implemented by MicroStation from the V8i version. For this we should give the right-click to the mouse, choose “Unlock”, and then drag it to the left margin.
1. Hide Ribbon
 To hide it, just type the command “ribbonclose” and disappears from view. The same can be done giving right-click on the Ribbon bar and choosing “close”. If you want to make it visible again type the command “ribbon“.
Although there is no need to hide it entirely, you can use the “minimize” option and will be kept an innocent bar that will not affect us and eventually we can access to it for grabbing the fourth affection it needs.
 2. Activate command bars.
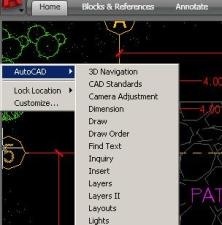
If you hide or minimize them we’ll need common usage bars, for this we must go to the left lateral edge and give right-click to the mouse’s button.
Then in the AutoCAD option, choose the bars of our interest. Generally:
- Draw
- Modify I
- Dimension
- Layers
- Zoom
And that’s ok, now it resembles the old one. Now it’s time to begin our work!

To access the menu bar (file, view, format …) will have to resort to the red letter in the corner.
It is also possible settings, using custom bars, as that method of the 25 most commonly used commands, all these changes can be saved as a file .cui and for this it is possible to duplicate the one in:
C: Documents and Settings User Application Data Autodesk AutoCAD 2009 R17.2 enu support acad.cui
Then the changes can be saved in the USB or email it to apply to our will in a foreign machine.
 Autocad Software, Bentley Microstation, Gis Google Earth, Gis System Geomate Provides Services For Complete Gis Software And Solutions, Autocad Software, Autocad Courses, Bentley Microstation, Microstation Software, Gis Google Earth, Open Source Gis And More.