Bentley Site is one of the tools include within the package known as Bentley Civil (Geopak). In this case we’re going to see how to create a terrain model based on an existing 3D map.
1. The data
I’m using a file in three dimensions, which contains a triangulated model in which each object is a 3Dface, called by Microstation as shapes.

2. Management of the .gsf project
Create project
The .gsf (Geopak site file) files stores information of different Geopak applications and is a sort of binary database. To create one we must do the following:
Site modeler > Project Wizard > Create new project > Next > assign name “terreno san ignacio.gsf” > Next.
Then, it appears the Project bar, so we choose:
Project > Save
Open project
Site modeler > Project Wizard > Open existing project > Browse.
We search the Project recently created, then select Open.
3. Store objects in the .gsf
We now require that the .gsf contains the map information, so we must tell what kind of objects are.
Create a new model
New site model > we assign the name to the model “dtm san ignacio” > ok.

 Storing the graphics
Site modeler > project wizard > Import 3D graphics
In the panel that appears, we assign the object’s name, in this case “dtm”, we specify the characteristics of tolerance and object’s type, in this case as void. It could have been selected contours in case of having contour levels, break lines, boundaries, etc.

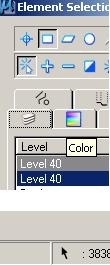
Then, with the select elements button, we select all of the view points. In order to get a non complicated selection, we use the block option and make a box around all objects.
Press the apply button, and in the lower panel appears a counter object in descending order, while you’re entering them to the project.
Until now, Geopak understands that all of these objects are a mesh of interconnected objects.
4. Export to TIN
Now what we need is that created objects can be export as Digital Model (TIN). For this we do the following:
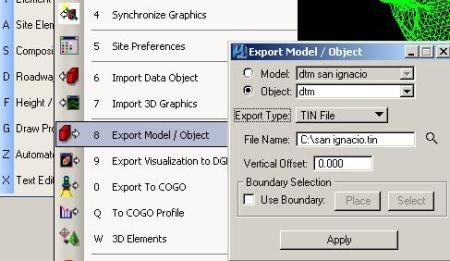
Export Model / Object
And in the panel we choose that what we export will be only the object and type; it can be a binary file or XML Land. We choose TIN File.

We also define the name of the file and it’s possible to establish a vertical offset. As we’ll send objects we do not choose a boundary.
And there it is. It’s a matter of choosing the way you want to see the TIN; with contour levels, at what distance, in view or in vector, these topics will be seen in another post.

 Autocad Software, Bentley Microstation, Gis Google Earth, Gis System Geomate Provides Services For Complete Gis Software And Solutions, Autocad Software, Autocad Courses, Bentley Microstation, Microstation Software, Gis Google Earth, Open Source Gis And More.